Tuesday, May 9, 2017

No Churn Vanilla Ice Cream

We enjoy eating ice cream as a family, who doesn't?  Don't answer if you don't.  It can be challenge to make ice cream if you don't have an ice cream churn, its an uncommon kitchen appliance and even if you do then you also need ice and ice cream salt.  Getting all the supplies together may prove a challenge or maybe you just want ice cream without all the fuss.  This is a no fuss easy ice cream recipe that calls for just three ingredients and a few minutes of active preparing.  This is also a great base for adding a variety of mix-ins or toppings.  We like to make it into cookies and cream ice cream by adding crushed Oreo's or you could add my previous recipe of fruit salsa on top, that would be a delicious treat on a hot Summer evening.

Delicious simple vanilla ice cream, the start of a delicious and wonderful Summer evening on the back porch.


Ingredients:

1 Teaspoon Vanilla Extract
1 12 ounce can Sweetened Condensed Milk
1 pint Heavy Whipping Cream


Pour cream into a mixer, mix with the whisk attachment on low for a minute then increase speed to medium and whip until stiff peaks are formed.  When you hold the whisk straight and the cream on the whisk remained straight up.


 Remove bowl from stand mixer, pour in sweetened condensed milk and vanilla extract to the whipped cream.  Gently stir the mixture with a spatula until all ingredients are combined.

 Pour mixture into a freezer safe lidded container and freeze for at least 2-4 hours.  

Serve in your favorite bowl.

Enjoy!

No Churn Vanilla Ice Cream

Ingredients:
1 Teaspoon Vanilla Extract
1 12 ounce can Sweetened Condensed Milk
1 pint Heavy Whipping Cream

Process:
Pour cream into a mixer, mix with the whisk attachment on low for a minute then increase speed to medium and whip until stiff peaks are formed.  When you hold the whisk straight and the cream on the whisk remained straight up.

Remove bowl from stand mixer, pour in sweetened condensed milk and vanilla extract to the whipped cream.  Gently stir the mixture with a spatula until all ingredients are combined.

Pour mixture into a freezer safe lidded container and freeze for at least 2-4 hours.  

Enjoy!

Sunday, April 30, 2017

Fruit Salsa

As you all know I absolutely enjoy cooking, baking, preparing food of all sorts.  My pantry is full of a variety of ingredients and after hosting a party for my sister in law Shawn who sells Tupperware I slowly opened up to the possibilities of an organized kitchen and pantry with Tupperware.   Back In February I became a Tupperware consultant myself because I believe the products are great and worth sharing.  Last night my friend Rhonda let me host a Taco's & Tupperware Party at her house.  I made a lot of food including a traditional tomato salsa and a fruit salsa.   The fruit salsa was the big hit of the night and several ladies asked for the recipe so here it is for your enjoyment and pleasure.  Should you be interested in buying Tupperware or hosting a Facebook Tupperware or traditional in home Tupperware Party my website is here.

Aldi's has a great snack, cinnamon and sugar churros and they are the perfect food to eat with this fruit salsa.  They are the same as the churro's Taco Bell sells I think.  You could dip cinnamon and sugar tortilla chips in it too I suppose.


Ingredients:

1 lb Strawberries
1 pint Raspberries
3 Kiwis
2 Mangos
Juice from 1/2 Lime

 Rinse all the fruit.  Cut green stems off strawberries.  Peel mangoes

This is my Tupperware chop prep bowl, it hooks onto the drawer and allows me to peel over it. Its like Rachel Ray's garbage bowl but not on my counter so its out of the way.  

Cut the mango around the seed.  The seed is in the middle, if you cut a small portion of the mango on the bottom you can have it stand up and you cut from the top and along the edge of the seed.  Cut into  chunks.

 Peel the kiwi and cut into chunks.

Place the fruit in a Tupperware Power Chef if you have one or a food processor and chop the fruit.  You could also chop the fruit in a blender.  Otherwise chop the fruit into small pieces with a knife.  The Tupperware Power Chef is a great tool for the kitchen since it doesn't require electricity, it has a a pull cord.  It would be a great kitchen gadget for the kitchen and for camping.  My daughter Haley is modeling how to use the Power Chef, the amount of fruit in this salsa necessitated filling the container one and a half times to get all the fruit chopped but it would all fit in a standard food processor.


After all the fruit is chopped, pour into a bowl and squeeze the lime juice on the fruit and stir.  Its ready to dip into.  Remember this is highly perishable so eat it the same day, although it is so delicious you aren't likely to have left-overs. 


Enjoy!


Fruit Salsa

Ingredients:

1 lb Strawberries
1 pint Raspberries
3 Kiwis
2 Mangos
Juice from 1/2 Lime

Process:

Rinse all the fruit.  Cut green stems off strawberries.  Peel the mangoes.
Cut the mango around the seed.  The seed is in the middle, if you cut a small portion of the mango on the bottom you can have it stand up and you cut from the top and along the edge of the seed.  Cut into  chunks.

Place the fruit in a Tupperware Power Chef, food processor, or blender and chop the fruit.    Otherwise chop the fruit into small pieces with a knife. 

After all the fruit is chopped, pour into a bowl and squeeze the lime juice on the fruit and stir.  Its ready to dip into.  Remember this is highly perishable so eat it the same day, although it is so delicious you aren't likely to have left-overs. 

Enjoy!

Thursday, March 2, 2017

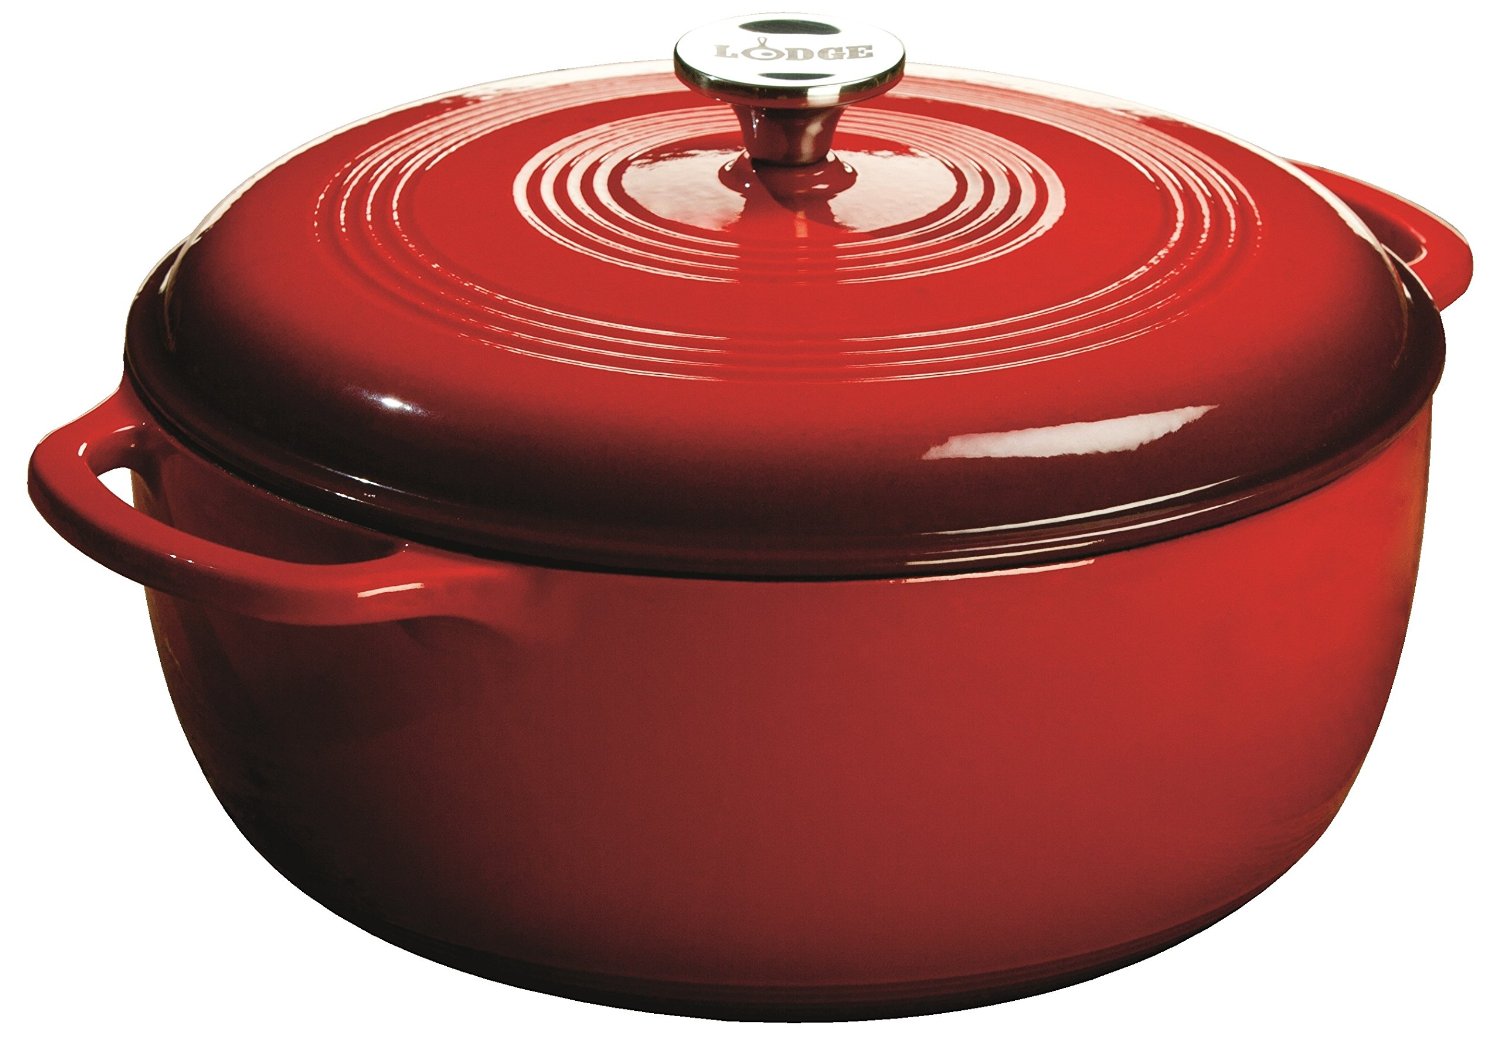
Stephanie's Kitchen Drawer: Enamel Dutch Oven


Remember my wild yeast starter and book about bread making?  I learned crusty bread needs steam and since a professional steam oven was way out of my price range the next best solution mentioned a variety of books and blogs was a dutch oven.  My yeast starter is getting bigger by the week so I needed to get serious about sourdough break baking.  After baking two loaves of sour dough bread in the 7.5 quart Lodge Dutch Oven I am a believer.  The bread was perfect and delicious.  I bought this dutch oven here.  You don't need the biggest Dutch Oven though, the 3 quart model would work well and your loaf would grow high versus wide like mine did.


Stephanie's Food For Thought


Last year just before Christmas I had this wonderful and crazy idea to make homemade chocolate chip Panetone for Christmas breakfast.  We have a family tradition of eating Panetone for Christmas morning.  My children don't like the traditional Panetone with dried fruit but they do like the chocolate chip variety.  I had been holding onto Panetone paper molds for a few years with the intention of making homemade Panetone.  I have a book recommended by my expert chef/scientist PhD friend Kristy called "The Bread Baker's Apprentice: Mastering the Art of Extraordinary Bread."  I bought the book on Amazon here.  In this book is a great section on Panetone and it's history along with a recipe.  I highly recommend the book.  

Back to the wild yeast starter.  I wanted my own wild yeast starter so I could make traditional Panetone,  I bought this wild yeast starter from Amazon here.   My yeast starter wasn't ready in time for making the Panetone but I have used it to make the sourdough bread recipe found in "The Bread Baker's Apprentice: Mastering the Art of Extraordinary Bread."  The bread was delicious.  I highly recommend this starter and the book if you get a chance to order them both.   My starter is kept in a half gallon mason jar in my refrigerator.  I feed it once a week with high gluten flour and filtered water.  

Stephanie's Kitchen Drawer: Pressure Cooker Part 3


Have you heard about the latest in electric pressure cookers?  It's called the Instant Pot.   I left my pressure cooker in NYC with a friend since I had cooked chili in it for our very last Astoria Ward Halloween Party and Chili Cook-off.   We were moving and I had my friend Nellie hold onto the pressure cooker with the chili in it and bring it to church and told her to keep the pressure cooker after the activity.  Anyway point is I gave up my pressure cooker and have cooked without it for a little over a year.  Recently Amazon was celebrating receiving some award for excellence by giving every a discount of a little over $8 so I decided to take the plunge into the Instant Pot universe and buy one. I bought this particular instant pot.  This particular pressure cooker has over 16,000 reviews and averages 4 1/2 stars and is a Amazon #1 Best Seller so I figured all those reviews are very very good sign.  Today I'm using it for the first time to cook pork tenderloin.  We have a weekly food menu that calls for pork on Thursday's for dinner.  Pork tenderloin is one of the most versatile, inexpensive, and tender cuts of meat you can find.  I'll let you know what I think of it after I've tried it out on a few recipes.  

Monday, February 29, 2016

Dairy Free Orange Julius

If you remember my previous Orange Julius recipe, you know it has ice cream in it, so it isn't exactly dairy free.  This recipe is for my friends and family who may need to or wish to exclude dairy from their diets.  Really I'm just a sucker for trying to outdo myself and find out if it is possible to make a healthy substitute for a favorite food.  We love milkshakes, smoothies, any blended drink of the non alcoholic nature.  This was an experiment truthfully.  I used my family shamelessly as guinea pigs and had them drink it even before me.  My daughter's tend to be an either one or the other likes the smoothie or milkshake I make.  Lucky for me they both liked the Orange Julius.  Then I asked if it was a recipe worth sharing and my second daughter was confused, but she figured it out when we explained whether I should share it with you, and she said yes.  After they both said it was good, I tried it.  Guess what, they were right, and I agree it was good.  


We love blended drinks and this one is almost a guilt free treat.


Ingredients:

12.3 Ounces of Silken Tofu
1 Navel Orange
1 Teaspoon Vanilla Extract
1/2 cup Cane Sugar (White Granulated Sugar may also be substituted)
Orange Juice
Half Blender of Ice


Peel the orange, because this part just doesn't taste good.


Add orange and tofu to blender.


Pour enough orange juice in blender to come up to the three cup line.


Blend until smooth, or if using a Vita-Mix, use the smoothie setting
and blend until the program ends.


Enjoy!

Dairy Free Orange Julius

Ingredients:

12.3 Ounces of Silken Tofu
1 Navel Orange
1 Teaspoon Vanilla Extract
1/2 cup Cane Sugar (White Granulated Sugar may also be substituted)
Orange Juice
Half Blender of Ice

Process:

Peel the orange.

Add orange and tofu to blende

Pour enough orange juice in blender to come up to the three cup line.

Blend until smooth, or if using a Vita-Mix use the smoothie setting and blend until the program ends.

Enjoy!

Wednesday, February 3, 2016

Crunchy Beef Tacos

My family participates in Taco Tuesday.  We loved the Lego Movie, as you can tell.  Good thing is, we're eating tacos on Tuesday for dinner and not trying to Kragle each other.  Tacos are one of my favorite foods.  Since Tuesday is taco night, I try to make a different type of taco each week to spice up our menu.  On a particularly busy night, a couple weeks ago, I introduced my children to Taco Bell's family pack of tacos with both soft and crunchy.  Well needless to say, the crunchy tacos were a hit.  Last week I tried to make my own crunchy tacos, and well they weren't as big of a hit.  This week I decided to try and re-create the Taco Bell flavor, minus the weird ingredients that I knew had to be in those tacos.  While researching the ingredients in Taco Bell crunchy beef tacos, I learned the main ingredients, the normal ones and decided I could use those as a starting point.  Here before you, for your viewing and maybe your eating pleasure, is the recipe I came up with.  These tacos were indeed delicious.  I actually used fresh ingredients and no dried or powdered substitutes.

 Oh my goodness, are those some beautiful looking tacos.


Ingredients:

12 Crunchy Taco Shells
1 1/2 lbs. Ground Beef
1 1/2 cups Whole Canned Tomatoes in Sauce
1/4 cup Water
1/4 Yellow Onion
2 Dried Chili Peppers
4 Baby Bella Mushrooms (You can substitute 1/2 beef bouillon cube)
1 clove of Garlic
1 teaspoon Sea Salt
1/2 teaspoon Cocoa Powder
1 head of Romaine Lettuce
1 Tomato
1 cup shredded White Sharp Cheddar or Monterey Jack Cheese


Using a blender blend the tomatoes, cocoa powder, onion, garlic, mushrooms, chili peppers,
and water until smooth.  I used my trusty Vita-Mix and created a very smooth sauce.
A little back story to adding the mushrooms.  Mushrooms are high in the molecule
responsible for the umami flavor or beefy flavor.  I used the mushrooms as a natural way to
 boost the beefy flavor of the taco meat.  If you want to, you could use bouillon instead.
Taco Bell uses autolyzed yeast to add beefy flavor.


 Smooth sauce, see how pretty it is?


Pour sauce into small sauce pan over high heat.  Bring to a boil, then reduce to a simmer.
Simmer for 15-20 minutes.  


Dice the tomatoes, cut the lettuce, and shred the cheese.  These will be your taco toppings.
You may also add sour cream and salsa.  We were out of sour cream.  I know, for shame.  


Cook the beef in a large skillet over medium high heat.  If you have a wok spatula, use that, or a
flat wooden spatula.  Cook and break up the beef into small chunks just until cooked through. 


Add the sauce and stir to combine.  Simmer for another five minutes to allow
flavors to come together.


I heated up our taco shells on a small cookie sheet in our toaster oven on low heat
before serving the tacos.  
Spoon some of the beef mixture into the shell and spread some lettuce tomatoes and
cheese on the beef.  Top with Sour Cream and salsa.

Enjoy!

Crunchy Beef Tacos

Ingredients:

12 Crunchy Taco Shells
1 1/2 lbs. Ground Beef
1 1/2 cups Whole Canned Tomatoes in Sauce
1/4 cup Water
1/4 Yellow Onion
2 Dried Chili Peppers
4 Baby Bella Mushrooms ( You can substitute 1/2 beef bouillon cube)
1 clove of Garlic
1 teaspoon Sea Salt
1/2 teaspoon Cocoa Powder
1 head of Romaine Lettuce
1 Tomato
1 cup shredded White Sharp Cheddar or Monterey Jack Cheese

Process:


Using a blender blend the tomatoes, cocoa powder, onion, garlic, mushrooms, chili peppers, and water until smooth.  I used my trusty Vita-Mix and created a very smooth sauce.

Pour sauce into small sauce pan over high heat.  Bring to a boil, then reduce to a simmer.  Simmer for 15-20 minutes.  

Dice the tomatoes, cut the lettuce, and shred the cheese.  These will be your taco toppings.  You may also add sour cream and salsa.  

Cook the beef in a large skillet over medium high heat.  If you have a wok spatula, use that, or a flat wooden spatula.  Cook and break up the beef into small chunks just until cooked through. 
Add the sauce and stir to combine.  Simmer for another five minutes to allow flavors to come together.

You can also heat up the taco shells on a small cookie sheet, in a toaster oven or an oven on low heat, before serving the tacos.  

Spoon some of the beef mixture into the shell and spread some lettuce tomatoes and cheese on the beef.  Top with Sour Cream and salsa.

Enjoy!